Getting Started
How to set up, configure and test proxies.
Welcome to the official PXYEDGE documentation center. Here you will find configuration guides, tutorials, and technical reference to help you set up, configure, and maximize the performance of our premium proxy services.
How to set up, configure and test proxies.
Tutorials for location targeting, sessions and whitelist options.
Endpoint references and automation examples.
Troubleshooting and frequently asked questions.
If you register an account with Pxyedge on behalf of a company, you may be eligible for a free trial period and can receive trial traffic for connection testing and evaluation.
Trial bandwidth and available regions may vary depending on account type, verification status and current availability.
Making a request through a residential proxy from a customer dashboard is simple. Follow this quick-start process to configure authentication and test your first request.
curl -x http://youraccount:password@gateway.pxyedge.io:8000 https://api.ipify.orgThis section explains how to make requests, configure location targeting, control sessions and whitelist IPs when using rotating residential proxies.
Residential proxies can be used through standard HTTP clients, browsers, scraping frameworks and automation tools. They appear as real users and help reduce blocks during automated collection.
Build a request with authentication and optional location parameters.
| Parameter | Description |
|---|---|
| youraccount | Proxy account youraccount |
| zone | Name for IP pool |
| region | Country/region, random region without this parameter |
| st | The state you want to specify |
| city | The city you want to specify |
| session | Session string for sticky IPs |
Adding a region flag to the authorization header enables country-level targeting. If the local IP pool is unavailable, traffic may be routed through a nearby available region.
region-us
region-br
region-in
region-gb
region-ca
region-au
For example, a proxy in Brazil can be requested with region-br.
State targeting is useful when you need a more precise area within a country.
region-us-st-ca
region-us-st-ny
region-us-st-tx
For example, targeting California can use region-us-st-ca.
By default, generated sessions are valid for a period of time and support multiple requests. Reusing the same session helps keep one IP during multi-step automation.
youraccount-zone-session-random123
youraccount-zone-session-random123-sesstime-10
The same session value can be reused until the session expires or is actively released.
IP whitelisting allows you to access the residential proxy pool simply by connecting from an authorized IP. You can configure whitelist access in the dashboard.
{
  "code": 0,
  "data": {
    "whitelist": ["203.0.113.10"]
  }
}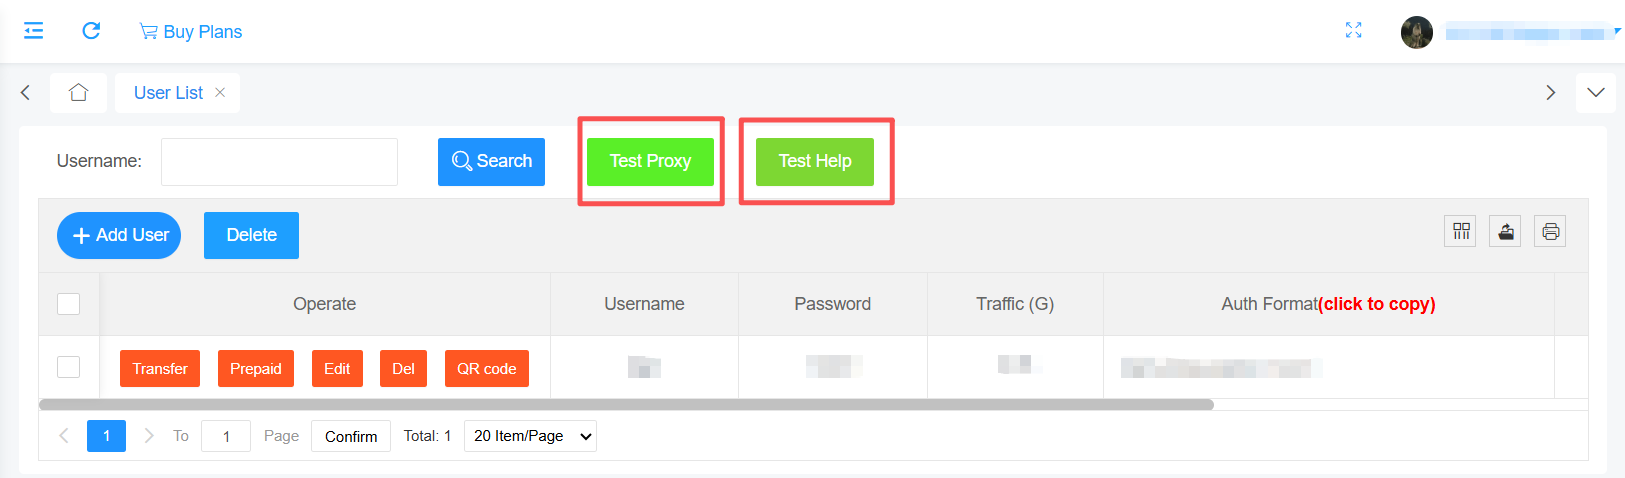
Test Command :
curl -x socks5://youraccount-zone-custom:yourpassword@128.14.209.70:3000 https://ipinfo.io
(no location is specified, an IP will be assigned randomly.)
Basic CMD Format:youraccount-zone-custom:yourpassword
Test URL – @128.14.209.70:3000 https://ipinfo.io
If you want to specify a country, region, and session, the following parameters will be appended to the basic CMD format:
-region-country-st-region-session-yoursession-sessTime-minutes
Example command 1:
curl -x socks5://youraccount-zone-custom-region-country:yourpassword@128.14.209.70:3000 https://ipinfo.io
Example command 2:
curl -x socks5://youraccount-zone-custom-session-yoursession-sessTime-minutes:yourpassword@128.14.209.70:3000 https://ipinfo.io
Example command 3:
curl -x socks5://youraccount-zone-custom-region-country-st-region-session-yoursession-sessTime-minutes:yourpassword@128.14.209.70:3000 https://ipinfo.io
Parameter description:
For Example
youraccount: David Password: David1
Specify Country: Afghanistan(AF) Specify Region: Balkh(BAL)
Session: david0 Session Time: 5
Then the cmd will be generated :
curl -x socks5://David-zone-custom-region-AF-st-BAL-session-david0-sessTime-5:David1@128.14.209.70:3000 https://ipinfo.io
(Select a "AF" IP and keep the session active for 5 minutes. By default, if the client disconnects, the IP will automatically change.)
(Some regions may currently have fewer active IPs online.
It is recommended to remove -st-region or try connecting to a different region.)
Official download: https://www.firefox.com
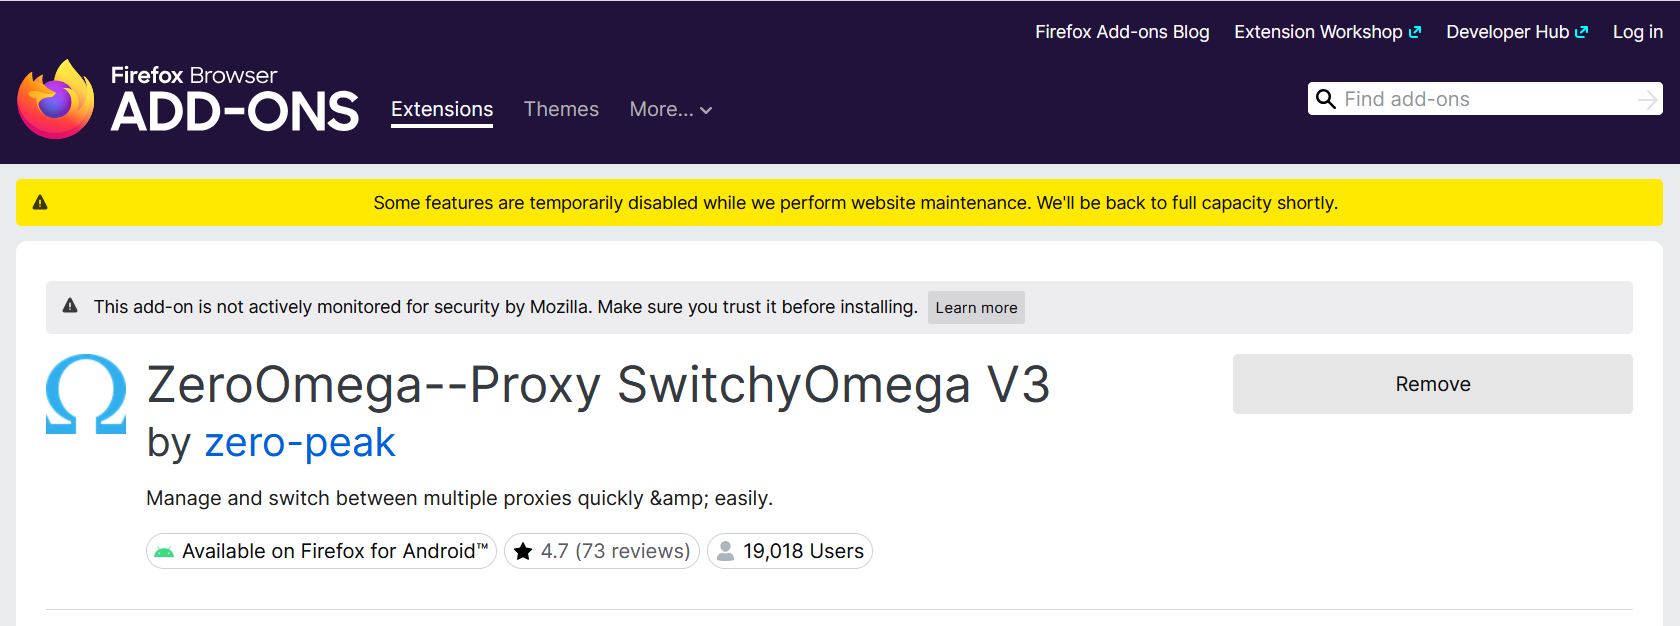
image1: ZeroOmega Extension Installation
Note: This add-on is maintained by a third-party developer. Make sure you trust the source before installing.
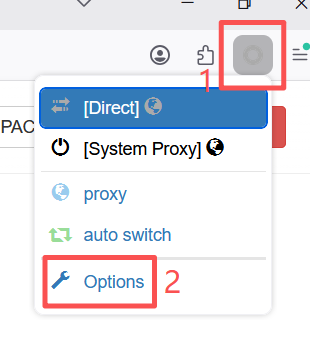
image2: Open Extension Settings
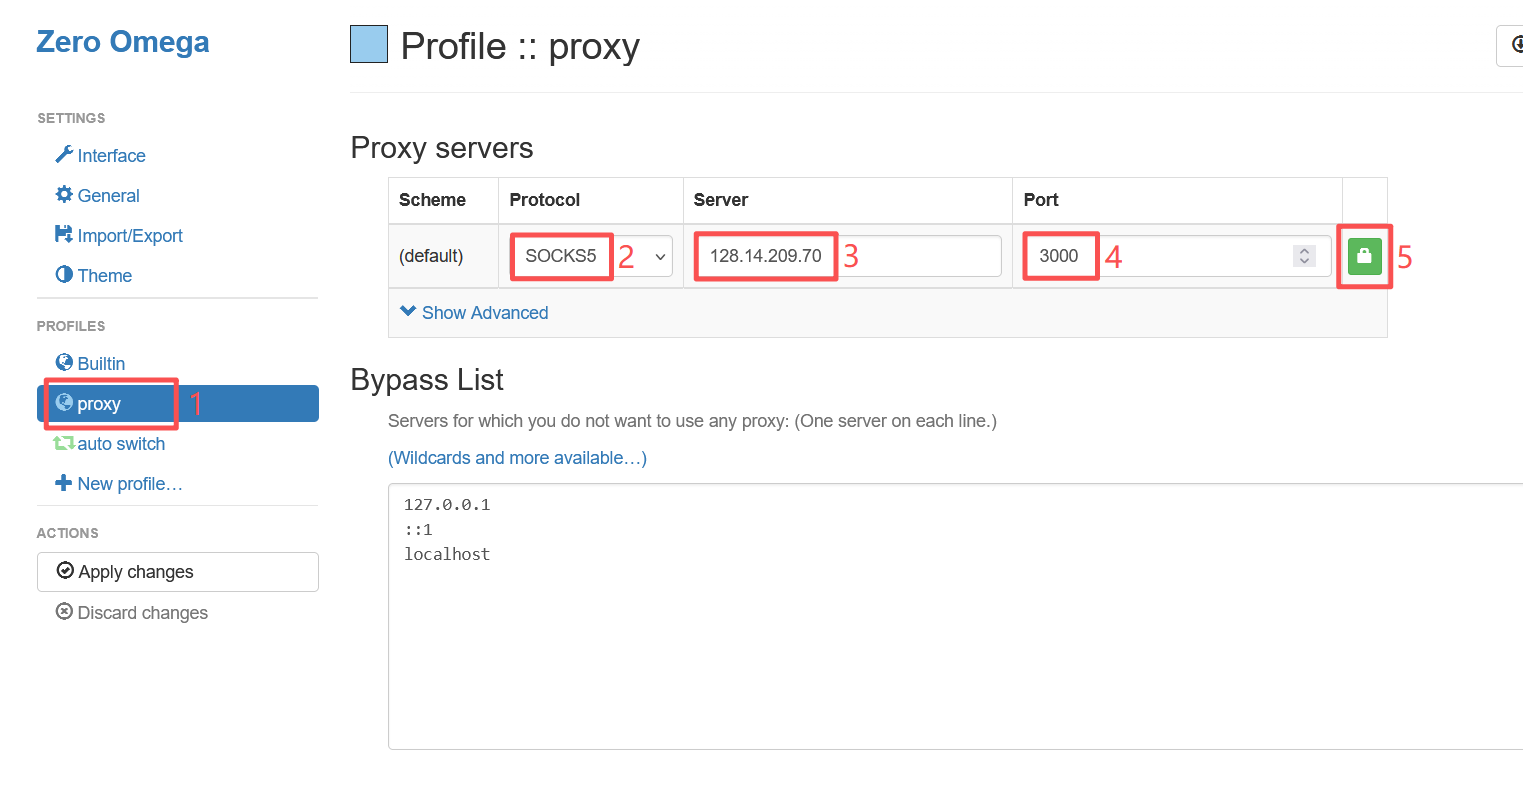
image3: Proxy Configuration Interface
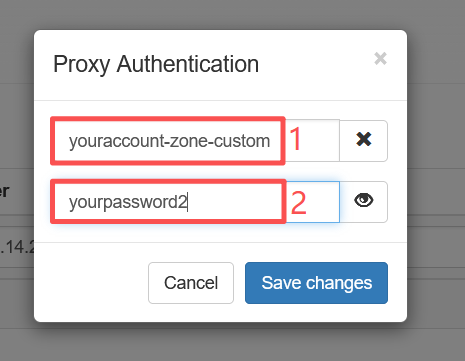
image4: Authentication Interface
Important: Please strictly follow the account format requirements in the help documentation to fill in the username. Incorrect format will cause the proxy to not work properly.
Detailed instructions: https://pxyedge.com/documentation/Click-the-Test-Proxy
Click the "Apply Changes" button to save and apply all configuration changes.
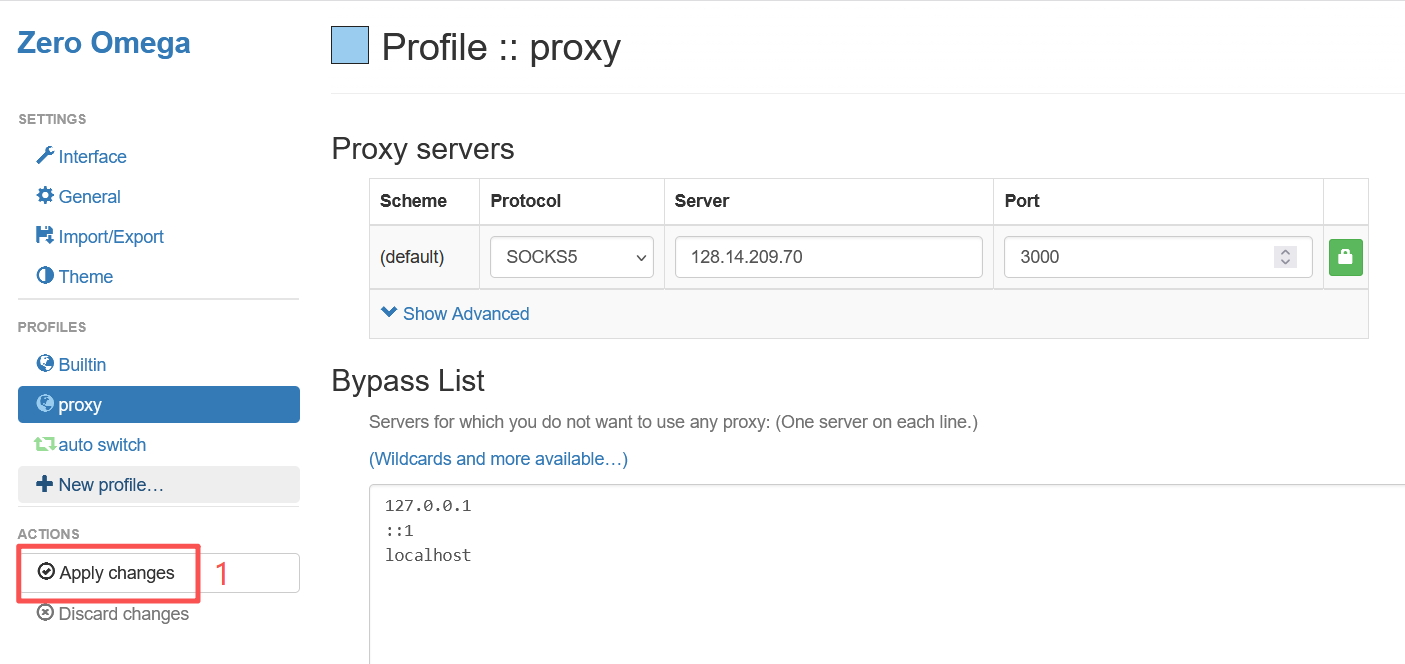
image5: Apply Changes
Click the Zero Omega icon, select "proxy" to enable the proxy, select "Direct" for direct connection without proxy.
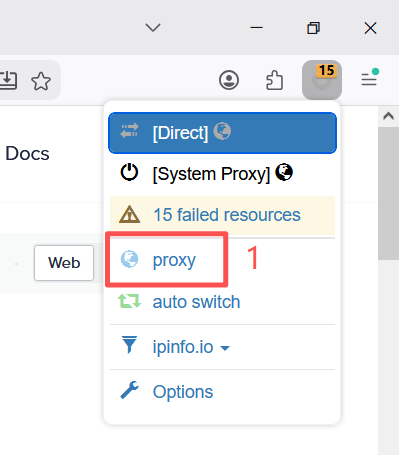
image6: Enable Proxy
Visit the following address to verify if the proxy is working:
https://ipinfo.io/what-is-my-ip

image7: IP Test Result
Verification Successful: If the displayed IP address matches the proxy server IP you configured, the proxy is successfully configured and working properly.
Use the API to query traffic usage, manage sessions, create authentication credentials and retrieve proxy endpoint information.
Query account traffic usage through API for reporting or billing integration.
| Parameter | Required | Type | Description |
|---|---|---|---|
| account | Yes | String | Login account |
| password | Yes | String | Login password |
| timezone | No | String | Format: UTC+08:00, UTC+09:30 |
GET /v1/user/usage?account=demo&timezone=UTC{
"code": 200,
"data": {
"total": 100000,
"used": 23680,
"remain": 76320
}
}Release a session to force a fresh IP allocation on the next request.
| Parameter | Required | Type | Description |
|---|---|---|---|
| account | Yes | String | Login account |
| password | Yes | String | Login password |
| session | Yes | String | Defines a string consisting only of letters and numbers, with a length ranging from 7 to 24 characters. |
POST /v1/session/release
{
  "session": "session001"
}Create proxy authentication credentials or maintain whitelist entries through API.
| Parameter | Required | Type | Description |
|---|---|---|---|
| account | Yes | String | Login account |
| password | Yes | String | Login password |
| ip | No | String | Whitelisted IP |
| type | No | String | auth password or whitelist mode |
POST /v1/auth/create
{
  "account": "demo",
  "ip": "203.0.113.10"
}Query IP and client information for the current proxy account or whitelist entry.
| Parameter | Required | Type | Description |
|---|---|---|---|
| account | Yes | String | Login account |
| password | No | String | Login password |
| No | String | Email registered by account ID |
GET /v1/client/info?account=demo{
"code": 200,
"data": {
"clientIp": "198.51.100.21",
"region": "US"
}
}Retrieve proxy endpoint information for your current product package.
| Parameter | Required | Type | Description |
|---|---|---|---|
| account | Yes | String | Login account |
| password | Yes | String | Login password |
| period | Yes | Int | Quantity |
| protocol | No | String | http or socks5 |
GET /v1/proxy/list?country=US&protocol=http